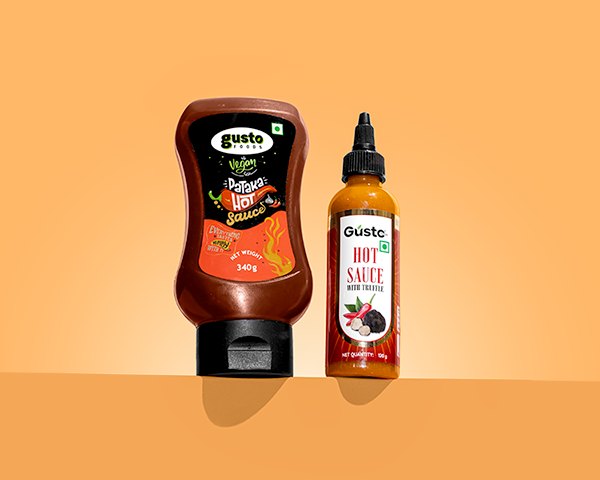
In the digital shelf era, your product photography is your handshake, your pitch, and your closer. Whether you are a D2C founder shooting in your living room or a brand manager hiring a studio, understanding the mechanics of great product visuals is non-negotiable.
This comprehensive guide answers the most critical questions about product photography in 2026, from the '400 Rule' to the best AI tools.
What is Product Photography?
At its core, product photography is a branch of commercial photography aimed at accurately and attractively representing a product for marketing purposes. Unlike artistic photography, the goal here is transactional: to give the viewer enough visual information and trust to click 'Buy' without touching the item.
It combines technical skills (lighting, focus) with psychology (color theory, aspiration) to bridge the gap between digital browsing and physical ownership.
The Three Main Types of Product Photography
While there are many styles, most ecommerce photography falls into three buckets:
1. Studio (White Background): The industry standard. The product is isolated on a pure white background (RGB 255, 255, 255). This is mandatory for Amazon and creates a distraction-free look for catalogs.
2. Lifestyle (In-Context): Shows the product being used or in its natural environment. A watch on a wrist, a coffee maker on a kitchen counter. This sells the 'dream' and shows scale.
3. Detailed/Scale Shots: Close-ups of textures (leather grain, fabric stitch) or group shots that show the product variations. These answer specific customer questions about quality.
The 7 Basics of Great Product Photography
If you are shooting yourself or judging a portfolio, look for these seven fundamentals:
1. Lighting: The single most important factor. It defines shape and texture.
2. Sharpness: Use a tripod. Blurry products look cheap.
3. Color Accuracy: The photo must match the real product to avoid returns.
4. Angles: Standardize your angles (Front, Side, 45-degree, Top, Detail).
5. Composition: Give the product room to breathe but fill the frame.
6. Consistency: Every image on your collection page should have the same brightness and alignment.
7. Editing: Retouching dust/scratches is necessary, but don't over-edit reality.
Essential Equipment Checklist
You don't need a ₹5 Lakh setup to start. Here is the lean kit:
Camera: Any modern DSLR/Mirrorless or even an iPhone 13+.
Tripod: Non-negotiable. It allows you to shoot at lower ISOs and slower shutter speeds for maximum quality.
White Background: A paper sweep or white foam board.
Bounce Cards: White foam boards to reflect light into shadows.
Table: A sturdy surface to work on.
Tape: Gaffer tape to secure your background.
The '400 Rule' and Camera Settings
You might hear about the '400 Rule' (or 500/600 rule) in photography forums. Clarification: This rule is primarily for *astrophotography* (Max shutter speed = 400 / focal length to avoid star trails). It effectively has no relation to product photography.
For products, use these settings instead:
ISO: 100 (Lowest possible for no grain).
Aperture: f/11 to f/16 (High number for deep depth-of-field so the whole product is sharp).
Shutter Speed: Whatever the meter says (since you are on a tripod, slow speeds like 1/10th of a second are fine).
Step-by-Step Production Setup
Step 1: The Table. Place your table near a large window. Turn off all other room lights to avoid mixed color temperatures.
Step 2: The Sweep. Tape your white paper to the wall and let it curve gently onto the table. This creates the 'infinity' background.
Step 3: The Product. Clean it! Dust is your enemy. Place it in the center.
Step 4: The Fill. Place a white foam board on the side opposite the window. This bounces window light back onto the dark side of the product, lifting the shadows.
Step 5: The Shoot. Use your tripod. Use a 2-second timer so pressing the button doesn't shake the camera.
Which AI is Best for Product Photography?
In 2026, AI is a tool, not a replacement. Best common tools:
1. Midjourney: Great for generating creative backgrounds for composite work, but cannot generate your specific product accurately.
2. Photoshop Generative Fill: The gold standard for extending backgrounds or adding realistic props around your honest product photo.
3. Shopify Magic / Photoroom: Excellent for removing backgrounds and placing products in simple AI environments quickly.
Use AI to enhance the *environment*, never to fake the *product*.
How Much to Charge for a Photoshoot?
This is a common question for freelancers. Pricing a '30-minute photoshoot' is dangerous because setup takes time.
Don't charge by time. Charge by SKU or Image Usage.
Beginner: ₹300 - ₹500 per image.
Intermediate: ₹800 - ₹1,500 per image (includes better styling/editing).
Pro/Studio: ₹2,000+ per image (includes models, high-end gear, extensive retouching).
For a 30-minute shoot, you might photograph 5 products. Charging ₹2,000 - ₹5,000 total is reasonable if the quality is high.
Key Skills Needed
To succeed, you need more than a camera. You need Lighting Knowledge (understanding hard vs soft light), Post-Production (Photoshop skills to clean images), and Styling (knowing how to arrange props naturally).
Conclusion
Product photography is a spectrum. DIY is perfect for starting, but as you scale, image quality directly correlates with conversion rate. If you're ready to upgrade from the window-light setup to commercial-grade imagery, check out TeamTSB's studio services.